 Washington Trails
Association
Trails for everyone, forever
If you spend time in the backcountry, you’ll need a way to treat drinking water. Here’s what you need to know about the options. By Sandra Saathoff
You’re out with friends for a hike or a backpacking trip and you get thirsty, but your water bottle is empty. What do you do? Hopefully you’ve planned ahead and are near a stream, but in most areas it’s not safe to drink right from the stream. This is the moment you’ve been waiting for! You reach into your pack and whip out your trusty water treatment device, saving the day for you and your crew. All is right with the world, and that backcountry water tastes so good!
What, you say? You aren’t sure what this water treatment stuff is all about? Read on, dear hiker, and let’s learn about some options.
Why treat your drinking water? The short answer: It’s not fun to get sick. We’re in the wild, where animals live, doing all those animal things like drinking, pooping and rolling in strange stuff then walking through streams. There can be anything from silt and dirt to protozoa, bacteria and viruses in the water. We’d rather not be drinking those things.
What types of water treatment options are there and what do I need to remember about them? There are several types of water treatment options and while all of them are relatively simple, they are not created equal. Most water treatment options do a good job of removing protozoa and bacteria. Only some also destroy viruses; however, in the U.S. and Canada viruses are generally not a problem.

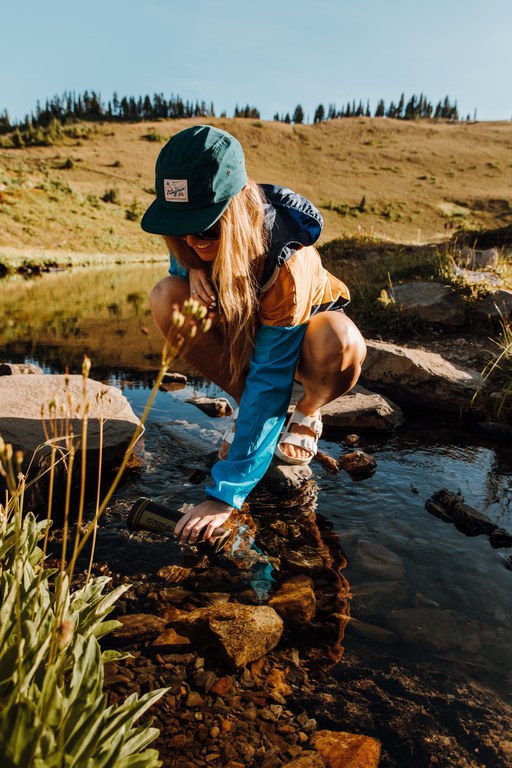
Be mindful of where you scoop. Photo by Eva Seelye.
Filters contain a built-in internal cartridge designed to catch particulates, bacteria and protozoa in the water and deliver clear, clean water out the other end. Most do not filter out viruses, but in Washington, we generally don’t need to worry about water-borne viruses. What we do need to remember is that glacial sediment or silty water clogs filters quickly, which can ruin a trip, so finding a feeder stream in areas with glaciers is important when using this method of water treatment. Pre-filtering your water (more on this later) before sending it through the filter can help, and an included syringe can be taken on trips to back-wash as needed. The water filtration industry has given hikers many options ranging from screw-on squeeze filters and straws to bottles with integrated filtration and gravity-fed hanging filtration systems that can be used for small groups of people. Each has its flow rate and sweet spot and you’ll need to decide the right system for you, if you go this route. Post-trip maintenance includes back-washing and sterilizing the filter and allowing it to dry fully before storing. Comparisons of filter options can be found with a quick online search. A filter is usually a great choice for day hiking or backpacking.
UV light purifiers are placed inside your water bottle and, when turned on, sterilize water that may contain parasites, bacteria and viruses in about 90 seconds. You’ll need to be sure the mouth of your bottle is large enough for the purifier. They don’t work in murky water, so you’ll need to either pre-filter or have a backup water treatment solution if you will be in areas where the water isn’t clear. Battery-powered, this method does require recharging after several days. Best for short trips or when carrying a charging device.

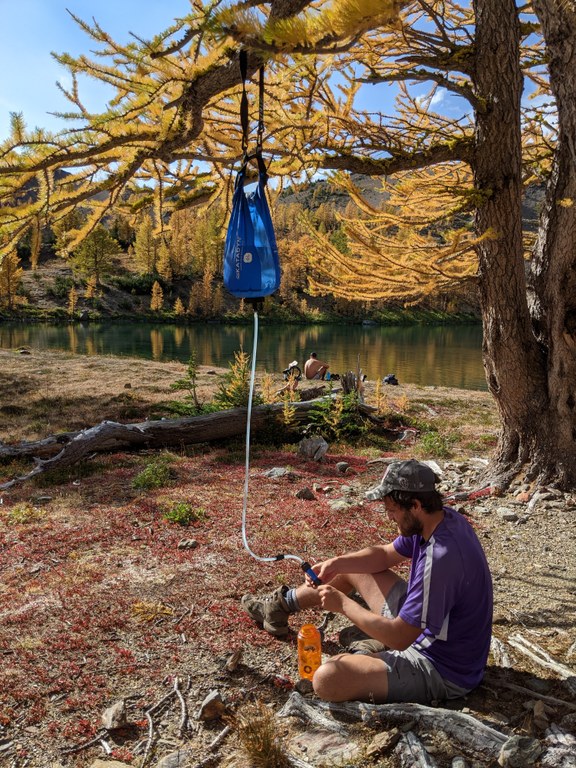
Letting a gravity filter do the work. Photo by Mordechai Treiger.
Most pumps are designed to filter out bacteria and protozoa, though you can find pumps that filter viruses as well. A pump comes with a main body, an internal filter cartridge and a hose you drop into the water source, making pumps easy to use in shallow areas like tarns and low flow streams. The internal cartridge is replaceable at end-of-life. Post-trip maintenance includes sterilizing and drying the cartridge.
A couple drops of chlorine or iodine, either in liquid or pill form, kills bacteria and viruses in the water. This option does require a 15- to 30-minute wait time before the water is safe to drink, but it’s a foolproof, inexpensive and lightweight method for treating water. It may taste a bit like chlorinated city water. According to the Minnesota Department of Health, chlorine and iodine have a low effectiveness in killing Giardia and are not effective in killing Cryptosporidium, making this treatment less desirable for some of the most annoying parasites we’re likely to run into. Chemical treatment also does not remove particles like bugs or leaves in the water. You can run the water through a bandana before chemically treating it to take care of the larger particles.

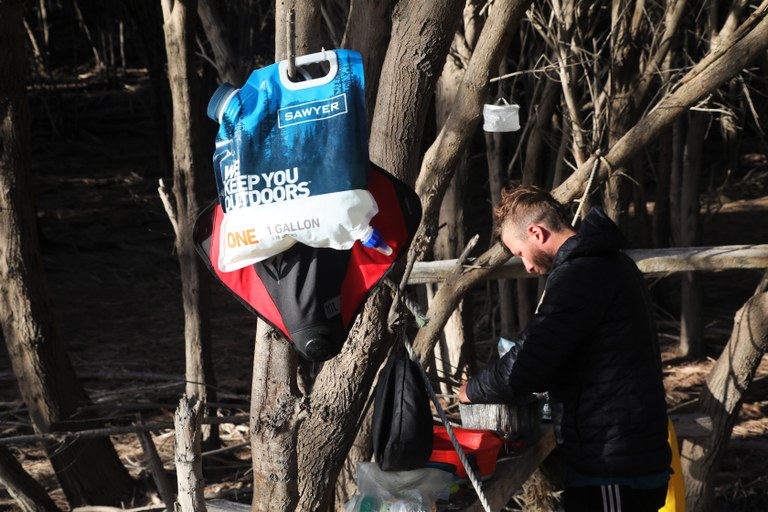
Gravity filters let you hang up a bag of water, and then let gravity do most of the work. Photo courtesy Sawyer.
Boiling water for one minute will kill bacteria, protozoa and viruses; above 6,500 feet, you’ll need to increase the time to three minutes. This method works well, but takes planning, as not everyone wants to stop and boil water every time they are thirsty. You’ll also need to figure in the extra fuel required over what you’ll need for regular cooking. This would likely not be the most convenient option for a day hike.
If conditions are particularly gnarly, you may want to pre-filter the water before sending it to your primary treatment choice. A low tarn in late summer may be your only option. If that’s the case, use what you have with you to maximize effectiveness and palatability. A doubled-up bandana, buff or pantyhose placed over your cook pot can filter out the biggest chunks making filters and UV purifiers much more effective.

For most water treatment options, freezing temperatures are your worst enemy. Filters and cartridges will freeze and crack on the inside, rendering them useless. Even though you won’t notice this, your filter is no longer doing its job, so sleep with your filter in a plastic bag inside your sleeping bag on nights approaching freezing and keep your filter inside your jacket if the days are that cold. Batteries on UV pens will not last as long in cold conditions. Keeping them next to your body can help. And boiling water may take longer, necessitating even more fuel.
Finally, it’s important to remember that though the water you’ve spent time filtering or purifying is clean and useful for drinking, washing and cleaning wounds, the water around it has not been treated. A bag you’ve used to collect water should never be the same bag you drink from (unless it has a filter attached). The water on the outside of your bottle is also not clean unless it has splashed out from the inside after being treated. Keeping the clean and dirty things separated and labeled is a helpful way to stay safe in the wild.
Making a choice about what water treatment option is right for you might be overwhelming, but this info can help you figure out what you need. With so many options available, you’re sure to find the best setup for you, whether you’re out for a day hike or multi-day backpacking trip.