How Backcountry Crews Put in Log Bridges in Challenging Locations
If you’ve ever crossed a log foot bridge, you’ve probably been grateful for the safe route across a river. But have you ever wondered how those log bridges get installed?
If you’ve ever crossed a log foot bridge, you’ve probably been grateful for the safe route across a river. But have you ever wondered how those log bridges get installed? We wanted to hear the backstory, so we checked in with James Montgomery, a trail crew supervisor at Mount Rainier National Park, who has a lot of experiences working with the bridges.

A narrow log bridge along Spray Park in Mount Rainier National Park. Photo by Toby Finch.
James says that log bridges like this are usually used in locations where it doesn’t make sense to install a more permanent structure that is likely to wash out soon. Mount Rainier’s rivers are extremely dynamic and often change course. In the summer, rivers can rise or fall 2 feet in a single day.
To begin the process of installing a bridge, crews look for logs that are already dead and down. (They don’t use standing trees.) They’re looking for relatively straight logs that are long enough to span the river — and as close as possible to the crossing location. Materials for the support posts and handrails are selected in a similar fashion. Once crews select a log, they look at its shape and determine which side should go down. The upper side is then flattened. First, a series of perpendicular cuts is made across the log, never more than a quarter of the way through to keep the log’s strength. Then the chunks created by the cuts are chopped out with an ax, creating a surface to walk on. The goal is to create a surface with good traction that is at least 10 inches wide the whole way across the log.

A crew moving a bridge to the spot of installation. Photo courtesy NPS.
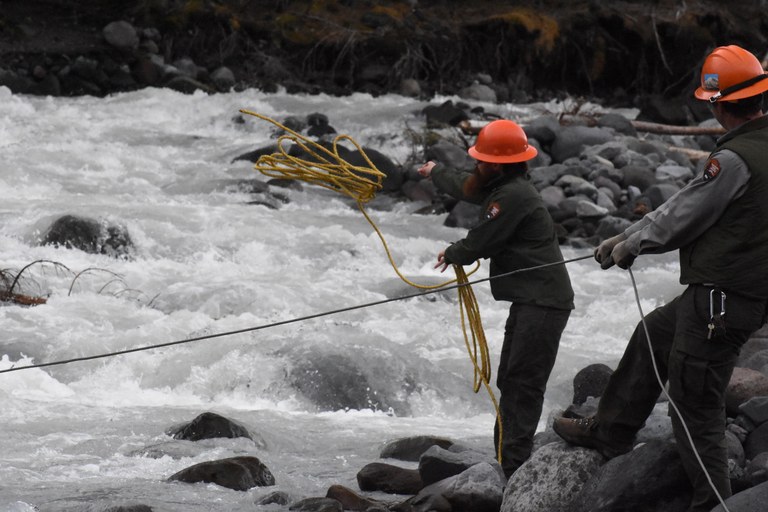
Once an appropriate log is found and shaped, it’s usually pulled into place using hand-powered winches and rigging systems, a series of cables and pulleys that make it easier to move heavy objects. It’s then installed across the river using the same method. Crews do a lot of careful planning beforehand to ensure safety. Communication is key and crews often use radios or hand signals, because it’s hard to hear across a raging river.
Once the logs are in place, crews install the supporting posts and the handrail — which have had their bark removed in advance to make them more secure. While some of the crew are installing the handrail, others move rocks to secure the bridge where it meets the bank and provide some stability. That process, known as “rocking-in,” also makes it easier to get on and off the bridge.
Installing a log bridge can take anywhere from a day to six days. Crews have to also factor in time to get to the site to do the actual work, which may mean hiking in from each side of the crossing, or finding a place up or downstream where it’s safe to cross. And sometimes the bridges have to be reinstalled after they wash out — sometimes once a year, sometimes several times a year. James has, on more than once occasion, installed a bridge only to have to go back and re-install it the next day. He estimates that about 25 log bridges are installed in the park each year.

Crew members using ropes to move the log bridge over the river. Photo courtesy NPS.
James reminds hikers that bridges can wash out at anytime, and the park might not always be able to re-install them quickly. Hikers should be prepared, if a bridge is out, to either hike out a different route (always have a map) or wait until the water recedes to safe levels before crossing.
“I don’t know why, but it seems as though the more time we spend trying to make a foot-log or handrail look good, the more likely it is to be washed out in short order,” James said. “Anytime we slap something in figuring it will be washed out within the week, it tends to stick around for a few years. When this happens, I figure it is Mother Nature having a bit of a laugh at our expense.”


Comments